Table of Contents
The OMNeT++ IDE is based on the Eclipse platform which is an extensible, Java based framework. While it started as an IDE framework only, its main goal is to be a generic integration platform. Extensions (called plug-ins) can be written in Java language. Plug-ins can be simply added to an existing Eclipse installation, extending it with new functionality by contributing various user interface elements into the platform user interface.
The OMNeT++ IDE is in fact an Eclipse installation with some additional - simulation related - tools pre-installed:
- The OMNeT++ feature which contains all OMNeT++ specific tools you use: the NED, MSG and INI file editor, simulation launcher, result analysis tools, sequence char view, documentation generator etc.
-
CDT (C/C++ Development Tooling - eclipse.org/cdt) - for C++ development and debugging. This feature integrates
with the standard
gcctoolchain and thegdbdebugger. - Version control integration plug-ins for Git and Subversion.
To keep the size of OMNeT++ distribution small, the OMNeT++ IDE does not contain the tools required for Java development. If you would like to develop your own plug-ins for the IDE, you will need to install some additional components manually:
- JDT (Java Development Tools) - for generic Java development. JDT contains a Java compiler and all the editors debuggers and tools used during Java development.
- PDE (Plug-in Development Environment) - this component contains additional tools, API definitions and documentation for developing plug-ins. PDE requires the presence of JDT.
We recommend first learning the basics of Eclipse plug-in development. The best place to start is the Platform Plug-in Developer Guide which can be accessed from the Help menu after you have installed the PDE. Of course, you will need some Java programming experience as well.
To develop plug-ins for the IDE, you need to install the Eclipse Plug-in Development Environment (PDE) into the IDE. This section describes how to install PDE.
Start the IDE, and select Help -> Install New Software… from the menu. This will bring up the Install dialog.
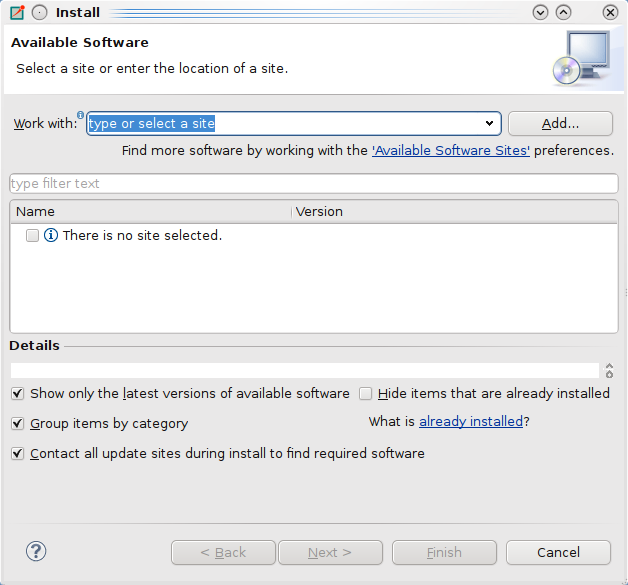 |
At the top of the dialog you can choose an Eclipse software repository to install software from. Select Indigo from the list.
If Indigo is not present, add it: Click the Add… button, then fill in the dialog that comes up:
-
Name:
Indigo -
Location:
http://download.eclipse.org/releases/indigo
Then click OK.
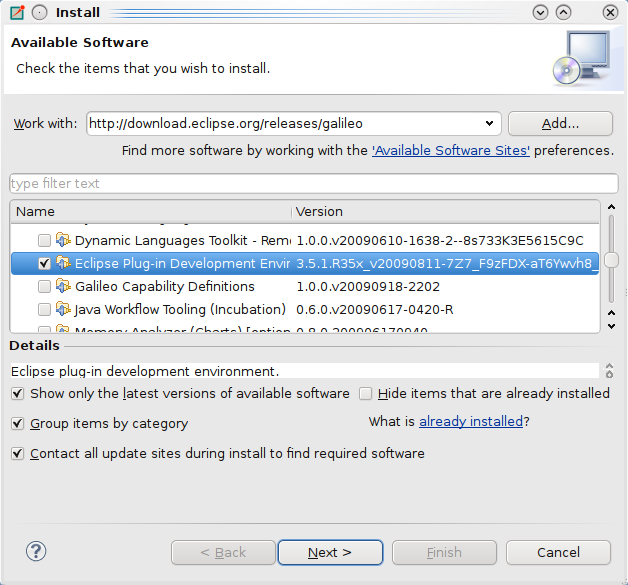
After a while, the Install dialog should show the list of available Eclipse packages. Select Eclipse Plug-in Development Environment from the General Purpose Tools group, then go thought the rest of the wizard to get PDE installed. This will install PDE’s prerequisites, most notably JDT (Java Development Tooling) as well.
 |
When the download and the installation finished, restart the IDE.
Now the IDE is ready for plug-in development.
Table of Contents
Once PDE is installed, we can create a small example Hello World plug-in. This plug-in will place a menu item on the main menubar. Invoking the menu item will launch a simple dialog.
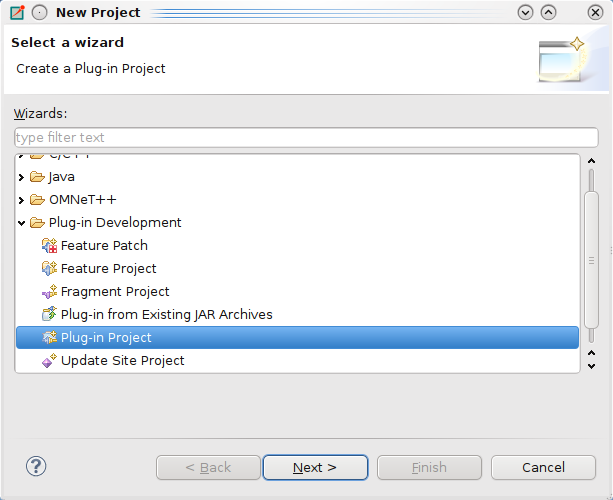
Choose File | New | Project… from the menu. The New Project wizard dialog comes up, with project type selection on the first page. Choose Plug-in Project from the Plug-in Development group and click Next.
 |
On the next page, enter org.example.hello for project name, then
click Next. On the following page (Content), you can just click
Next as well. The following page allows you to choose the initial content
for your project from among several code examples. Choose Hello, World,
then click Finish.
A new project named org.example.hello will be created.
The IDE will also ask you if you want to switch to the Plug-in Development perspective; answer Yes.
Open the project and explore the generated files. There are two important files that are often used during plug-in development: plugin.xml and MANIFEST.MF. They both contain metadata that describe how your plug-in should be used by the platform.
MANIFEST.MF contains basic information about your plug-in. External dependencies, name,
version number etc. The plugin.xml file describes what your plug-in contributes
to the platform. You should always specify your contributions otherwise they will not
appear on the user interface.
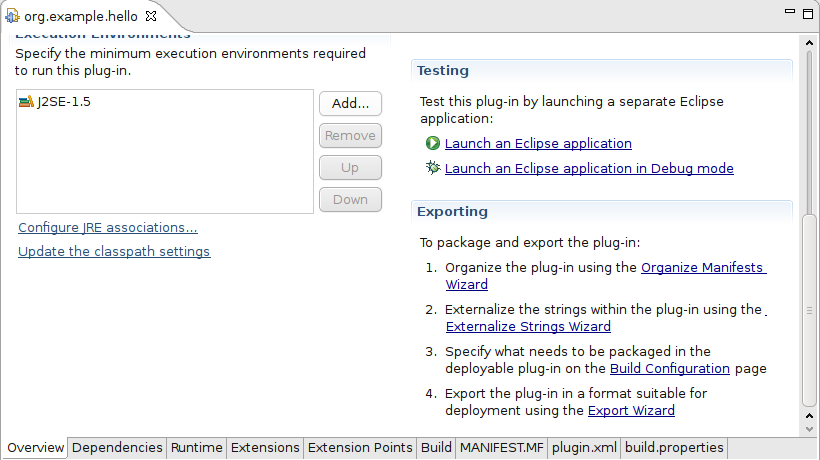
Double-click on one of the above files. This will start a form editor with several pages. Explore the possibilities. Later you can add other plug-ins here you are depending on, or you can specify what Java packages you plan to provide to other plug-ins. On he first page, there are useful shortcuts to export your plug-in in a deployable format (JAR file).
Of course you can have other files inside the plug-ins. You will need .class files (containing your
code of course) or image resources for icons.
On the Overview tab click the Launch an Eclipse application link
 |
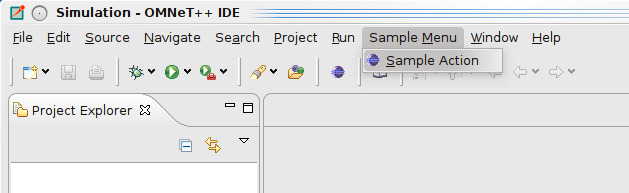
A new instance of Eclipse will be started containing the generated plug-in. If everything is OK you should see a Sample Menu containing a Sample Action. When clicked, it will bring up a message dialog.
 |
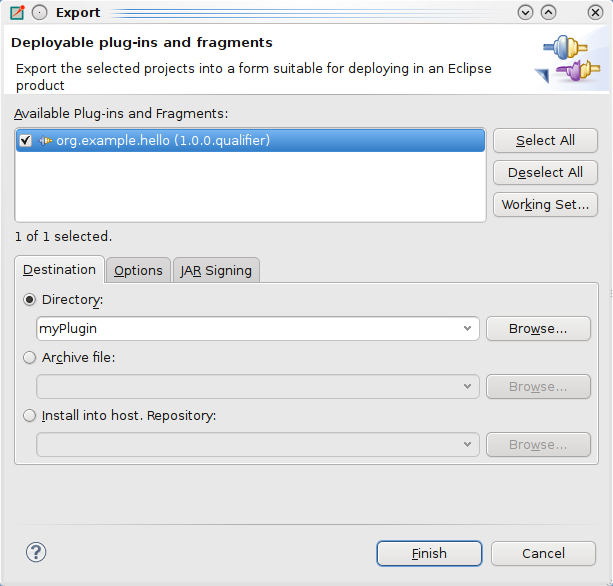
Use the Export plug-in link on the Overview page of the manifest editor.
Choose Directory radio button for Destination, specify directory name, and click [Finish]
 |
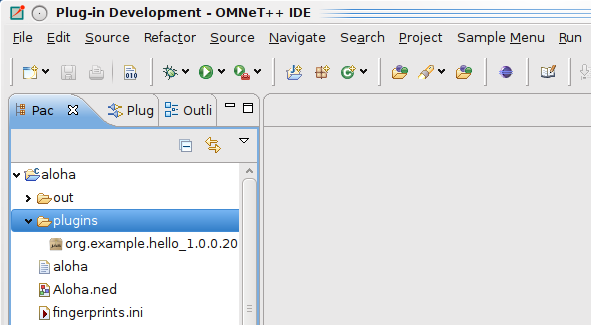
The plug-in will be generated as <dirname>/plugins/aaaa_1.0.0.201001061910.jar
Once you have a final, exported plug-in in a deployable format you have to copy it into your Eclipse installation (<omnetpp>/ide/dropins). You should restart the IDE so it can recognize it.
The OMNeT++ IDE can load plug-ins from the workspace (projects) as well. This can be useful if you have implemented an extension that is useful only for certain type of project. (e.g. a plug-in helping to assign IP addresses to hosts should be active only if the INET project is open).
Open an existing OMNeT++ project (e.g. aloha). Create a folder named plugins.
Copy the exported plug-in file (jar) into the plugins folder.
 |
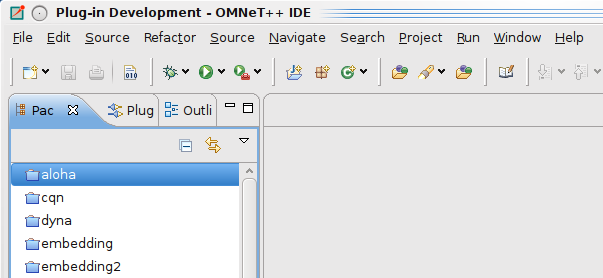
It should be activated automatically. If you delete it, or close the project it should disappear. If you replace it with a new version, it will be updated.
 |
Note
Not all plug-ins behave nicely; (they have to support correctly the activation and deactivation themselves). If you experience problems, it might be a good idea to restart the IDE.
It is out of scope of this manual to teach the reader on how to write Eclipse plug-ins. There are excellent books and on-line resources on this topic; we’ll list some of them below.
The most straightforward resources are the Eclipse manuals themselves. Open the Eclipse help system (Help -> Help Contents). If PDE is installed, you will find the following manuals in it:
- Platform Plug-in Developer Guide
- Plug-in Development Environment Guide
Searching for developing Eclipse plug-ins on the web will reveal many good tutorials, overviews and other articles.
A more in-depth coverage of the topic is the book Eclipse Plug-ins, by Eric Clayberg and Dan Rubel. Former editions were titled Eclipse: Building Commercial-Quality Plug-ins, which might be familiar to more people. The book has an associated web site: http://www.qualityeclipse.com.
Another book that we found useful is The Official Eclipse 3.0 FAQs by John Arthorne and Chris Laffra. The book is now available online: http://wiki.eclipse.org/index.php/The_Official_Eclipse_FAQs.
One can find several more good books on amazon.com about Eclipse’s architecture, services, developing plug-ins.
The rest of this Manual assumes that you are familiar with Eclipse concepts and Eclipse plug-in development in general.
Developing a plug-in for the OMNeT++ IDE is exactly the same how you would develop a normal Eclipse plug-in. In addition to Eclipse API, you can access the API provided by the OMNeT++ specific plug-ins. These plug-ins allow you to browse, access and even modify the data structures representing the NED and MSG files. To access OMNeT++ specific APIs, you first have to add the appropriate OMNeT++ plug-in as a dependency to your plug-in.
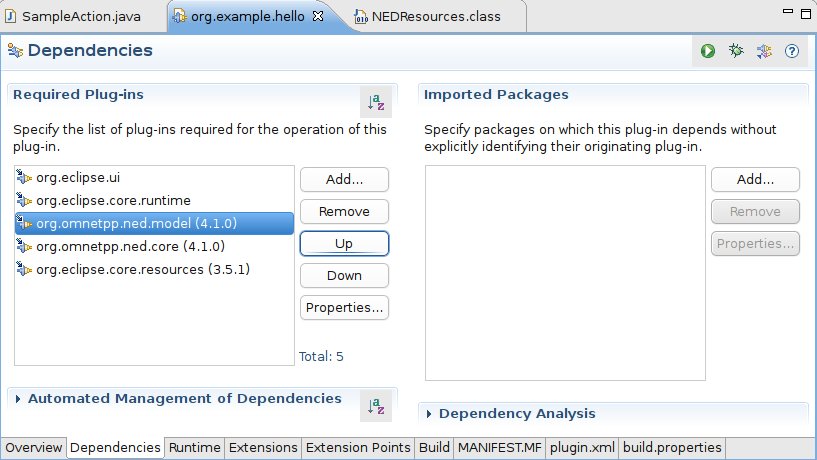
Double click on the plugin.xml file in your plug-in project and open the dependencies
page. Add the org.omnetpp.ned.model and the org.omnetpp.ned.core plug-in as a dependency.
(Also add org.eclipse.core.resources. We will need it for our example later.)
 |
We will modify our earlier Hello world example to print out the number of NED types
in all open projects. Note that this is not the same as the number of NED files. Some NED files
may contain more than one type while others contain none at all (e.g. package.ned).
We can access the internal NED model via the NEDResources class.
Open the SampleAction.java file and modify its content:
public void run(IAction action) {
  MessageDialog.openInformation(
    window.getShell(), "NED Info",
    "Number of NED types: "+NEDResources.getInstance().
        getNedTypesFromAllProjects().size());
}
The parsed model of all NED files can be accessed via the NEDResources.getInstance() singleton object.
The NEDResources class is the main entry point to access and manipulate the content of NED files.
If you know the fully qualified name of a type, you can obtain its type descriptor (INedTypeInfo)
using the getToplevelNedType() method. There are numerous other ways to access and query the NED types.
Check the documentation of the NEDResources and INedTypeInfo class.
Similarly, you can access information about message files using the MsgResources.getInstance() method.
Check the documentation of the IMsgTypeResolver and IMsgTypeInfo interfaces for further information.
Note
You have to add the org.omnetpp.ned.core and org.omnetpp.ned.model plug-ins to the project dependencies
to access their classes.
If you want to work with projects or files in your plug-in, there are several useful classes that can help you.
The ProjectUtils class from the org.omnetpp.common plug-in can be used to enumerate open or
referenced projects, or NED folders. You can add OMNeT++ support to existing projects.
If you add org.omnetpp.common to your project dependencies, you can use CDTUtils to enumerate C++
source or excluded folders. MakefileToools and 'MetaMakemake` from org.omnetpp.cdt are used to
control the Makefile generation.
Note
The source of the OMNeT++ plug-ins are bundled with the IDE. You can easily access their documentation.
The OMNeT++ plug-ins define some extension points that can be used to change or extend the current functionality of the IDE.
From org.omnetpp.common:
-
org.omnetpp.common.wizard.contenttemplates: You can add additional content templates to theNew Filewizards. You must specify the location of the template files in your project (by default it istemplates). -
org.omnetpp.common.wizard.templatecontributors: You can add template variables to all of your templates. The plug-in must implement theorg.omnetpp.common.wizard.IContentTemplateContributorinterface to contribute to the template variables.
New wizards can be added to IDE by implementing them directly in Java. For complicated wizards, this is the recommended strategy. If your wizard just gathers some data from the user and then generates some file as the result, we recommend creating template-based wizards instead, as they do not require Java language knowledge. For further info about how to write custom wizards please read the IDE Customization Guide.