Table of Contents
- 1. Writing Wizards
- Motivation
- Overview
- Using the IDE
- Writing an Example Wizard
- Wizard Types
- Configuration Keys
- Templates
- Custom Wizard Pages
- Extending the Wizards in Java
- Common Pitfalls
- XSWT Tips and Tricks
- Appendix A - Widgets in XSWT
- Appendix B - Predefined Template Variables
- Appendix C - Functions, Classes and Macros available from Templates
List of Figures
- 1.1. The New Wizard wizard
- 1.2. The File | New menu
- 1.3. Editing an XSWT file
Table of Contents
- Motivation
- Overview
- Using the IDE
- Writing an Example Wizard
- Wizard Types
- Configuration Keys
- Templates
- Custom Wizard Pages
- Extending the Wizards in Java
- Common Pitfalls
- XSWT Tips and Tricks
- Appendix A - Widgets in XSWT
- Appendix B - Predefined Template Variables
- Appendix C - Functions, Classes and Macros available from Templates
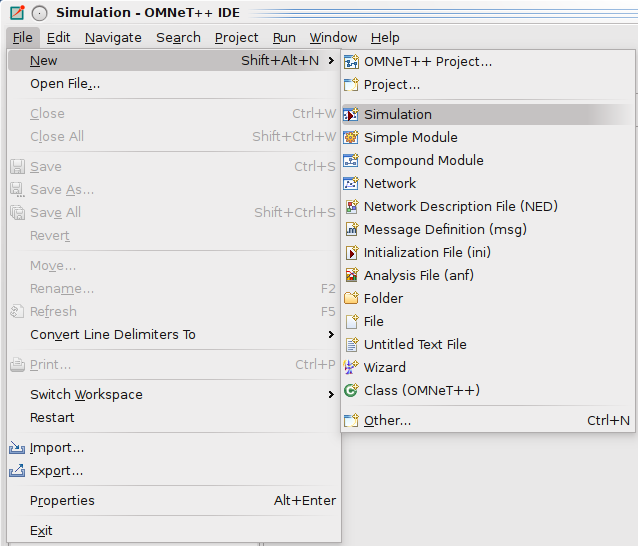
The IDE offers several wizards via the File|New menu: New OMNeT++ Project, New Simple Module, New Compound Module, New Network, New Simulation, New Msg File, and New Ini File. This chapter describes how a user can add content to these dialogs to create wizards that are specific to simulation models. These wizards include a New INET Ad-Hoc Network wizard, a New MiXiM Simulation wizard, an Import INET Network From CSV File wizard, a New MiXiM Radio Model wizard, and others.
For someone who is writing a model framework which will be available for the general public, wizards are a great way to educate future users about the simulation model. While documentation and example simulations are somewhat passive ways of showing off model features to users, wizards encourage users to experiment with the model and explore its capabilities. The right set of capable wizards can give users a jump start by emphasizing learning by doing.
Users can prepare these wizards with little effort and without any Java or C++ programming, and can be distributed with the corresponding model framework (i.e. INET or MiXiM). When end users import the model framework project into the IDE, the wizards are automatically added to the corresponding wizard dialogs; the end user does not need to install them or do anything to deploy the wizards.
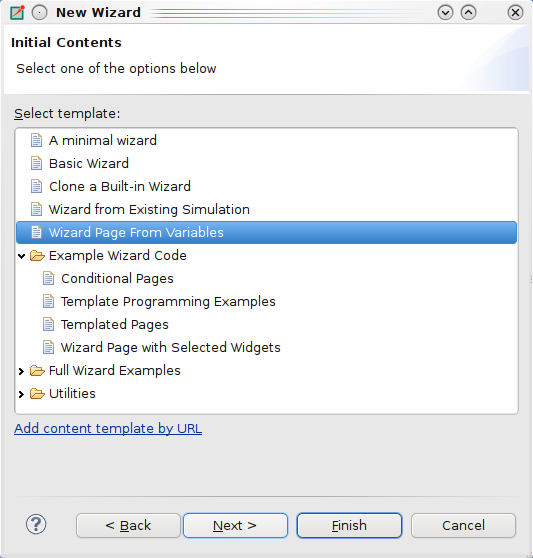
To facilitate the creation of wizards, we have also added a New Wizard wizard to the File|New menu.
Custom wizards are read from the templates/ folder of OMNeT++ projects.
Wizards are implemented by mixing a templating engine (for generating
the output files) and a GUI description language (for custom wizard pages to
gather user input for the file generation). Because of the use of a
templating engine, we will also refer to custom wizards as "content templates."
The IDE offers several OMNeT++ related wizard dialogs: New OMNeT++ Project, New NED File, New Simple Module, and so on. Every content template can contribute to one or more of those wizard dialogs.
In the templates/ folder, every subfolder that contains a template.properties
file is treated as a content template (other folders are ignored). Every
content template folder may contain several types of files:
-
The
template.propertiesfile contains general information about the wizard. It defines the initial value for the template variables and specifies the custom wizard pages to be shown when the wizard is run. -
*.ftlfiles are template files that will be copied (without the.ftlextension) into the target folder after template variable substitution. -
*.xswtfiles describe custom wizard pages that gather user input. -
*.fti(template include) files are included by*.ftlfiles. This can be used to factor out common parts from the template files. The wizard ignores.ftifiles (i.e. does not copy them into the new project or folder). -
*.jarfiles can be used to extend the wizard’s functionality with dynamically loaded Java code. -
All other files are regarded as files that have to be copied into the
target folder verbatim when the wizard runs. The wizard folder may contain
subdirectories which may also contain files of the above type (except
template.properties, of course).
Template processing uses the FreeMarker library (http://freemarker.org) and
all template syntax supported by FreeMarker can be used. In particular, variable
references of the syntax ${varName} will be replaced with the variable value.
The FreeMarker language also offers constructs that make it a full programming language: variable assignments, conditionals, loops, switch statement, functions, macros, expression evaluation, built-in operators, etc., as well as access to fields and methods of classes defined in Java. This means that any algorithm can be expressed in the FreeMarker language, and if that is not enough, one can directly access Java classes using FreeMarker’s Bean Wrapper.
Tip
Documentation for the FreeMarker template language can be found at: http://freemarker.org/docs/index.html
Templates can use several sources for input. They can:
- gather information from the user, using custom wizard pages,
- call any Java code to execute any arbitrarily complex algorithm,
- call external programs, and
- read and write from/to any file on the filesystem
Custom wizard pages are defined in XSWT (http://xswt.sourceforge.net).
XSWT is an XML based language that allows the definition of SWT (the widget set
used by Eclipse) widget hierarchies, without the need to write any code in Java. XSWT also maps
widget properties to XML attributes so the visual appearance of the wizard pages
can be easily tweaked. It is also possible to invoke methods on the generated widgets
and use the SWT layout containers, allowing further customizations. Each .xswt file
in the template directory defines a separate wizard page which can be shown
either conditionally or unconditionally.
Tip
XSWT documentation and a tutorial can be found at: http://www.coconut-palm-software.com/the_new_visual_editor/doku.php?id=xswt:home.
Note
Currently we use XSWT 1.1.2. Newer XSWT versions from http://www.coconut-palm-software.com/~xswt/integration/plugins/ did not work well.
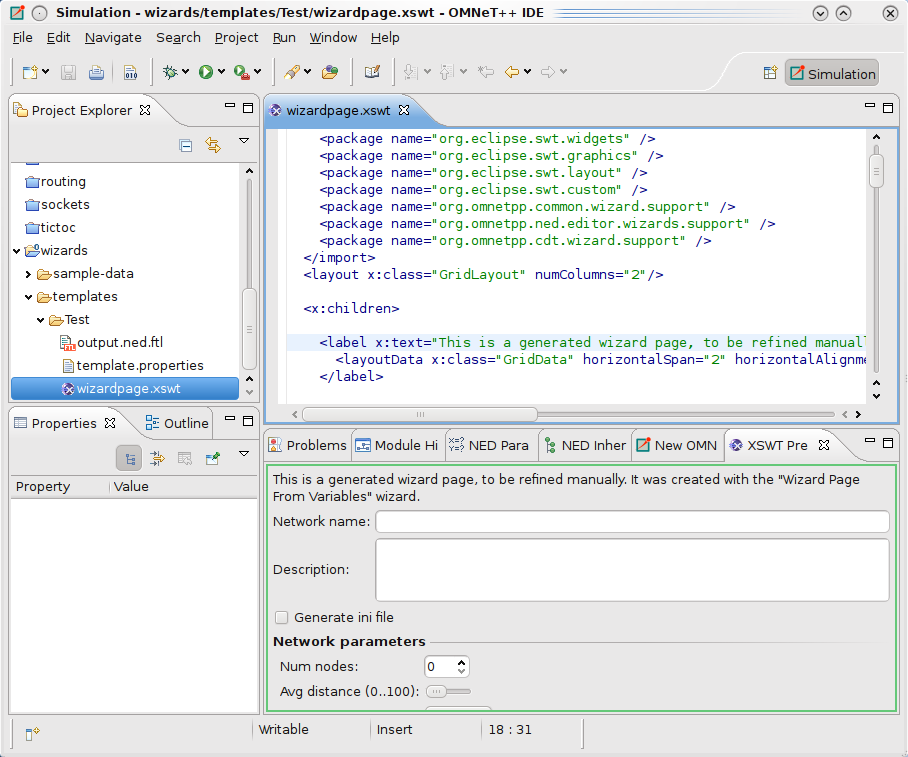
The IDE offers support for editing both .ftl and .xswt files to help
create wizard pages and templates.
Double-clicking on an XSWT file will open it in the XSWT editor. The editor provides basic syntax highlighting. An extremely useful feature of the IDE is the XSWT Preview, where you can preview the form being edited (it updates when you save the file). The Preview should open automatically when you open the XSWT file; if it does not (or you close it), you can access it via the Window|Show View… menu item.
Some (custom) widgets may not appear in the Preview; this is because the Preview does not load jar files from the projects.
The FreeMarker Editor opens when you double-click files with the *.ftl or
*.fti extension. The FreeMarker Editor offers basic syntax highlighting, validation
(error markers appear during editing if the template is not syntactically
correct), and basic content assist. Content assist can help you with directives
(<#...> syntax) and built-in operations (like ?number, ?size, ?default, etc).
The content assist popup appears automatically when you type <# (actually
a closing > is also needed for the editor to recognize the tag), and
when you hit ? within a directive or an interpolation (${...}).
In the following sections, we will create a simple wizard as an example, which will support either creating a simulation (complete with NED and INI files), or just a single NED file with a network defined in it. The user will be able to specify the type and the number of the submodules the network contains.
The first step when creating a wizard is to create a new folder
under the templates directory of the project. A file named template.properties
must be present in the newly created directory. This file is used to configure
the wizard. Create a folder a folder named templates/examplewizard under the
project, then create template.properties and add the following lines to it:
templateName = New Test Wizard
templateDescription = Generate an example
templateCategory = Test Wizards
supportedWizardTypes = simulation, network
These lines specify the name, type and category for the wizard. Category is used to
specify how the wizards will be grouped in the tree control section of the template selection page.
Wizard type specifies in which New … Wizard your wizard will appear.
You can specify one or more of project, simulation, network, etc.; the list
of all possible wizard types will be covered later in this document. In this case,
the wizard will appear in the New Simulation and New Network wizard dialogs.
You can now decide what data you would like to ask the user to provide. Template variables and their values can be defined as key-value pairs:
nodeType = Dummy
networkSize = 6
The nodeType variable will be used as the submodule type in your network, while
the networkSize defines how many submodules you want in the network.
We define a custom wizard page where the user can specify the values of the above variables (i.e. override their default value, specified above).
page.1.file = parameters.xswt
page.1.title = Network parameters
We will use the file parameters.xswt to define the layout and the content of the new wizard page.
Note
There are numerous other configuration keys that can be used in template.properties. See the
"Configuration Keys" section for an exhaustive list of options.
Files with .xswt extension (Wizard Page definitions) are used to define the UI and
add new wizard pages to gather user input for template generation. In the previous
section, we specified that the file called parameters.xswt will contain the new
wizard page definition. We will add a spinner control to specify the size of our network
and a text control to specify the node type. Create a new file called parameters.xswt
with the following content:
<xswt xmlns:x="http://sweet_swt.sf.net/xswt">
  <x:import>
    <!-- Import all widgets and utility classes  -->
    <package name="java.lang"/>
    <package name="org.eclipse.swt.widgets" />
    <package name="org.eclipse.swt.graphics" />
    <package name="org.eclipse.swt.layout" />
    <package name="org.eclipse.swt.custom" />
    <package name="org.omnetpp.common.wizard.support" />
    <package name="org.omnetpp.ned.editor.wizards.support" />
    <package name="org.omnetpp.cdt.wizard.support" />
  </x:import>
  <!-- Create a two-column layout  -->
  <layout x:class="GridLayout" numColumns="2"/>
  <x:children>
    <!-- First row -->
    <label text="Number of nodes in the network:"/>
    <spinner x:id="networkSize" minimum="2" x:style="BORDER"/>
    <!-- Second row -->
    <label text="Type of nodes:"/>
    <text x:id="nodeType" x:style="BORDER"/>
  </x:children>
</xswt>
The above defined wizard page will have two columns. The first column contains labels
and the second contains editable widgets.
The x:id="varName" attributes in the spinner and text control definitions are used
to bind a template variable to the control. When a page is displayed, the content of
the bound variables are copied into the controls. When the user navigates away from
the page or presses the Finish button, the content of the controls are copied back
to the bound variables. These variables can be used in the template files we are
about to define in the following section.
Note
To see the list of all available widgets, check the Appendix.
When the template is used, the contents of the template folder (and its subfolders)
will be copied over into the new project, thus preserving the directory structure
with the exception of template.properties (it is also possible to specify
other files and folders to be ignored by specifying a file list for the
ignoreResources configuration key).
When the wizard is being used, a pool of variables is kept by the wizard dialog.
These variables are initialized from the key = value lines in the
template.properties files; they can get displayed and/or edited
on custom wizard pages. Eventually, they get substituted into *.ftl files
(using the ${varname} syntax).
Some variables have special meaning and are interpreted by the wizard dialog
(e.g. the nedSrcFolders variable determines which folders get denoted as
NED Source Folders by the New OMNeT++ Project wizard). Variables can be used
to generate output file names, can be used as input file names, and can serve
as input and working variables for arbitrarily complex algorithms programmed
in the template (*.ftl) files.
Let us have a quick look at the FreeMarker template language.
Variables can be inserted into the output using the ${varname} syntax. One can
also write expressions inside ${..}. For example, ${numServers?number + 1}
uses the number built-in operator to convert the numServers variable to a number,
adds one to it, and inserts the result into the template output. FreeMarker
has many other functions (conversion to string, upper-case version of a string,
size of an array, etc.) that work as built-in operators.
Programming facilities can be accessed via directives that have the <#...> syntax.
Use <#if> (<#if> cond>..<#elseif cond>..<#else>..</#if>) for conditionals;
<#list> for iterations and loops (e.g. <#list words as w>..</#list>;
<#list 0..9 as i>..</#list>; <#list 9..0 as i>..</#list>); and
<#assign> for assigning variables (<#assign x=5>; <#assign x>the number ${i}</#assign>).
One can define functions (<#function>) and macros (<#macros>). You can also include
other templates (<#include>). Here, we only covered a small fraction of FreeMarker’s
possibilities; we recommend that you read the FreeMarker manual for more information.
Let us create a file with a filename that has an .ftl extension (e.g. untitled.ned.ftl).
Because of the extension, this file will be processed by the templating engine.
The actual name of the file does not matter, because the
<@setoutput .../> directive instructs the templating engine to output
everything from the current file into the file that is specified by the
targetFileName variable. The targetFileName, targetTypeName, bannerComment
and nedPackageName variables are automatically filled out by the wizard, based
on the filename and folder the user selected on the first wizard page.
<@setoutput path=targetFileName />
${bannerComment}
<#if nedPackageName!="">package ${nedPackageName};</#if>network ${targetTypeName}
{
node[${networkSize}] : ${nodeType}
}The template variables will be substituted into the template automatically.
Specific wizard dialog types will also define extra variables for use in the
templates. For example, the wizard type that creates a complete simulation (with all required files)
will put the simulationName variable into the context. To see all defined variables,
check the Appendix.
Tip
The New Wizard wizard in the IDE provides you with some working examples, useful utilities for writing wizards, and sample code for accessing various features along with other helpful information. The aim of these wizards is to help you become productive in the shortest time possible.
As a last step in our example, we will also create an INI file template:
Create a file called omnetpp.ini.ftl, and fill with:
<#if wizardType=="simulation">
network = ${targetTypeName}
</#if>
We need the INI file only if we are creating a simulation. If the
current type is not simulation, the content will be empty, and the
file will not be written to the disk.
The wizard will set the wizardType template variable when it executes,
so template code can check under which wizard type it is running (using <#if>..</#if>), and
execute accordingly. This feature allows the user to create templates that
can be used for multiple wizard types.
There are several types of wizards you can create. Each one has a different goal.
wizardType = project
Project wizards create new projects and let the user create files in them. It is possible to adjust project properties to customize the new project. You can add C++ support to the project, set source and NED folders, etc.
The first two pages of the wizard are standard: they prompt the user for the name of the new project and let the user choose a content template. These pages are followed by pages provided by the selected content template. If the user selected C++ support on the first page, custom pages are followed by the standard CDT New Project pages.
When the user clicks Finish, the wizard creates the project and configures
it according to the selected options (C++ support, source folders, etc.). Then,
template files are copied into the new project, performing template processing
as necessary. Templated pages are responsible for creating the package.ned
file according to the nedPackageName and namespaceName options, as well
as creating source files in the NED and C++ source folders.
Note
NED and C++ files are not automatically placed into the
NED and C++ source folders. Templated pages have to be written
(for example using setoutput) so that they explicitly create the files
in the proper places.
There are a few useful variables that template files use. The
rawProjectName variable contains the project name. This variable cannot be
directly used as C++ or NED package names, type names, etc, because it may
contain spaces or other characters not allowed in identifiers. For convenience,
the wizard provides sanitized versions of the project name that can be used
as identifiers; they are in the variables projectName, PROJECTNAME and
projectname, and differ in capitalization. The targetFolder variable
is set to /<project name>. These variables cannot be edited in custom wizard
pages.
The variables addProjectReference, makemakeOptions, sourceFolders and
nedSourceFolders affect the creation of the project before template files
get processed. It is allowable to provide an initialization value for these
variables in template.properties and to let the user change them in
custom pages.
For conformance with other wizards, the project wizard initializes
the following variables with different case versions of the project name:
targetTypeName, nedPackageName, and namespaceName. The targetMainFile
variable is initialized to projectName+.ned, but there is no requirement
for the template to actually create this file. It can provide a
different initialization value for these variables in template.properties
and can let the user change them in custom pages.
Tip
If the new project contains a simulation, it is recommended that targetTypeName
and targetMainFile are used as the network name and NED file name respectively.
Note
The targetFileName variable is not set because the project wizard
is not required to create a file.
See the appendix for the variable names that are supported in project wizard templates.
wizardType = simulation
A new simulation is basically a new folder containing all files required to run a simulation. The simulation folder usually contains NED files, an INI file, and possibly also CC, H and MSG files.
The first two pages of the wizard are standard; they prompt the user for the parent and name of the new folder, and let the user choose a content template. These pages are followed by pages provided by the selected content template. Simulations can only be created in new folders under existing projects or folders.
When the user clicks Finish, the wizard creates the folder. The template files are then copied into the new folder, performing template processing as necessary.
There are a few useful variables that template files can use. The
simulationFolderName contains the name of the new folder (without path).
This variable cannot be directly used as a C++ or NED identifier, because it may
contain spaces or other characters not allowed in identifiers. For convenience,
the wizard provides the simulationName variable which is a sanitized version
of the folder name. The targetFolder variable is set to the workspace path of the new
folder. These variables cannot be edited in custom wizard pages.
For conformance with other wizards, the simulation wizard initializes
the targetTypeName variable with the simulation name. The targetMainFile
variable is initialized to simulationName+.ned, but there is no requirement
that the template actually creates this file. It can provide a
different initialization value for these variables in template.properties
and can let the user change them in custom pages.
Tip
The intended purpose of targetTypeName and targetMainFile is to be used
as the network name and NED file name respectively in the new simulation.
Note
The targetFileName variable is not set because the simulation wizard
is not required to create a file.
The nedPackageName and namespaceName variables are set by the wizard to the
NED package name and C++ namespace expected for the given folder. These values
are derived from the folder path, the toplevel package.ned file and the
@namespace property in it, and cannot be overridden.
See the appendix for the variable names that are supported in simulation wizard templates.
wizardType = compoundmodule, network, nedfile, inifile, msgfile
These wizard types generate a single file. The first two pages of the wizard are standard; they prompt the user for the parent folder and name of the new file, and let the user choose a content template. These pages are followed by pages provided by the selected content template.
Note
Currently the wizard does not ensure that the created file will be under a NED/C++ source folder. This may change in the future.
When the user clicks Finish, template files are copied into the selected parent folder, performing template processing as necessary. The template files are expected to create a file with the name chosen by the user.
The wizard passes the file name to the template files in the targetFileName
variable.
Note
The wizard does not prevent the templates from creating other files than
targetFileName. It is the responsibility of the template author to
ensure that only a single file is created.
There are a few useful variables that template files can use. The
targetFolder variable is set to the workspace path of the parent
folder. This variable cannot be edited in custom wizard pages.
For conformance with other wizards, the new wizard initializes the
targetTypeName variable to a sanitized version of the file name (minus
extension). This variable can be used as a NED or message type name
in the generated file. The targetMainFile variable is the same as
targetFileName.
One can provide a different initialization value for the targetTypeName
variable in template.properties and let the user change it in custom pages.
The nedPackageName and namespaceName variables are set by the wizard to the
NED package name and C++ namespace expected for the given folder. These values
are derived from the file path, the toplevel package.ned file and the
@namespace property in it, and cannot be overridden.
See the appendix for the variable names that are supported in new file wizard templates.
wizardType = simplemodule
The simple module wizard creates a simple module, usually consisting of a NED file and C++ implementation files. This wizard works in a similar way as the New NED File or New Compound Module wizard, but it is allowed to create other files (C++ sources) in addition to the NED file.
wizardType = import
An import wizard is not a standalone type, but rather a flag on other wizard types. It makes the wizard appear in the File|Import… dialog in addition to the File|New … dialogs.
To access the import wizards, choose OMNeT++, Networks, simulations and other items as import source on the first page of the Import dialog. The next page will be the content template selection page. After choosing a template, the next page will be the file, folder or project name selection page of the New… wizard, followed by the custom wizard pages.
Note
If an import wizard supports more than one wizard types (e.g. project, simulation,
nedfile, etc.), the File|Import… dialog will use only one of those types. The type
is chosen in the following order of preference: network, nedfile, compoundmodule,
simplemodule, msgfile, inifile, simulation, and project. This may be changed
in the future to explicit wizard type selection.
wizardType = export
Export wizards can be accessed via the File|Export… dialog and export data into one or more files in the workspace or in the file system.
To access the export wizards, choose OMNeT++, Networks, simulations and other items as export destination on the first page of the Export dialog. The next page will be the content template selection page, followed by the custom wizard pages.
Export wizards do not have a standard file/folder selection page, the target file name(s) must be obtained from the user on custom wizard pages.
Tip
You can use the SaveAsChooser and ExternalSaveAsChooser custom controls
to prompt for a file name in the workspace and in the file system respectively.
The export wizard does not set targetFileName, targetMainFile, or any similar
variables. It is entirely up to the template author to define a variable for storing the
output file name, letting the user edit it, and saving the content in that file.
Template files are not allowed to produce any output; they are supposed to create the target files programmatically.
Tip
Templates can use static methods of the FileUtils class, such as
createFile(workspacepath, content) and createExternalFile(filesystempath, content),
to create the files. Here, content is a string that holds the text to be written
out into the file in the platform’s default encoding.
Tip
The content text may be assembled using plain string concatenation
(<#assign content = content + "\nsome text">), or templated content
(<#assign content>some text, ${foo} and ${bar}...</#assign>).
wizardType = wizard
A New Wizard wizard creates a wizard under the templates/ folder of a workspace
project.
The first two pages of the wizard are standard. They prompt the user to select
the project that will hold the wizard, choose the wizard name (name of the new folder under
templates/), and pick a content template. These pages are
followed by pages provided by the selected content template.
When the user clicks Finish, the wizard creates the folder under the
templates/ folder of the chosen project. After that, template files are copied
into the new folder, performing template processing as necessary.
There are a few useful variables that template files can use. The
newWizardName variable contains the name of the new folder (without path),
and newWizardProject contains the name of the project. The project name variables
(rawProjectName, projectName, PROJECTNAME, etc.) and targetFolder
variables are also set. These variables cannot be edited in custom wizard pages.
Note
The wizard does not set the targetFileName and targetMainFile variables.
See the appendix for the variable names that are supported in New Wizard wizard templates.
Tip
To create a template.properties file for the new wizard, use a
template.properties.ftl file in the wizard wizard. Similarly, you will
likely have files with the .xswt.ftl and .ftl.ftl extensions in the
wizard wizard. Inside .ftl.ftl files, use the <#noparse>..</#noparse>
directive to protect parts that you want to be copied verbatim into the
created wizards.
The template.properties file is a standard Java property file (key = value syntax)
that can be used to supply a template name, a template description,
and other information.
Recognized property file keys:
-
templateName - The template’s display name. This is the name that appears in the tree in the template selection page. This property defaults to the name of the folder that holds the wizard files.
-
templateDescription - Description of the template. This may appear as a tooltip or in a description page in the wizard.
-
templateCategory - Template category is used for organizing the templates into a tree in the wizard’s template selection page. Defaults to the name of the project that provides the template.
-
templateImage - Name of the icon that appears with the name in the wizard’s template selection page.
-
supportedWizardTypes -
Comma-separated or JSON-syntax list of wizard types (e.g.
nedfile,simplemodule,project,inifile) that this template supports. If not specified, the wizard will support all known wizard types. -
ignoreResources -
Comma-separated or JSON-syntax list of non-template files or
folders designating those files that will not get copied over to the new project.
The
template.propertiesfile and custom wizard page files automatically count as non-templates, so they do not have to be listed. Wildcards (*,**,?) are accepted. Note that*.foois interpreted as./*.foo; write**/*.footo mean foo files anywhere. -
verbatimFiles -
Comma-separated or JSON-syntax list of files that need to be
copied over into the target project verbatim, even if they have
the
.ftlextension. Wildcards (*,**,?) are accepted. Note that*.foois interpreted as./*.foo; write**/*.footo mean foo files anywhere.
The New OMNeT++ Project wizard also recognizes the following options (these options can be overridden from custom wizard pages):
-
addProjectReference - True or false; defaults to true. If true, the template’s project will be added to the referenced project’s list of the new project.
-
sourceFolders - Comma-separated or JSON-syntax list of C++ source folders to be created and configured. By default, none.
-
nedSourceFolders - Comma-separated or JSON-syntax list of NED source folders to be created and configured. By default, none.
-
makemakeOptions - Comma-separated list of items in the syntax "folder:options", or a JSON-syntax map of strings; it sets opp_makemake options for the given folders. There is no default.
There are additional options for adding custom pages into the wizard, as described in the next section.
For wizards, several variables are predefined, such as templateName, targetFolder, date, and
author; others, like targetFileName, targetTypeName, simulationFolderName,
nedPackageName, etc., are defined only for certain wizard dialogs.
A full list of variables is provided in the Appendix.
By default, templates are processed and copied with the same name (chopping the .ftl
extension), but it is possible to redirect the output of the template to a different
file using the <@setoutput path=.../> macro. The filename can contain slashes, too, which means that
one can write files in a different folder. If the folder does not exist, it will
be created. For example:
<@setoutput path=targetFileName/>
If filename is empty, the directive restores output to the original file name (the template’s name).
This also works if a folder name is given and only the file name is missing
(<@setoutput path="src/">). Then, it will write the file with the original name
but into the specified folder.
Note
If there are multiple setoutput macros with the same file name within a template,
the content will be concatenated. Concatenation only works within one template;
if you have multiple templates writing into the same file, they will overwrite
each other’s content. It is undefined which one will win.
Empty and blank files (i.e. those containing only white space) will not be created
(i.e. processing will skip writing it without any question, warning or error).
This allows you to easily create files conditionally; you just have to surround
the file body with <#if>..</#if>.
Note
The above rule also means that one cannot even deliberately create empty files
with templates. However, this "limitation" is easy to overcome.
Most file formats (NED, C++, INI, XML, etc.) have a comment syntax, so you
can write a file that contains only a comment ( // file intentionally left blank ).
Alternatively, you can create an empty file using the FileUtils Java utility class
(<@do FileUtils.createFile("empty.txt", "")!/>).
Note
Although blank files are not created, the template engine will not delete an existing file that happens to be already there with the same name.
The following properties can be used to define custom pages in the wizard. <i> is
an integer page ID (starting with 1); its ordering defines the order of wizard
pages.
-
page.<i>.file - The name of the XSWT file that describes the wizard page layout.
-
page.<i>.class - In addition to XSWT files, custom Java pages may also be defined in Java code. This can be useful when the wizard page would be too complex to describe with XSWT, when it would need to have significant active behavior, or when the wizard page code already exists in Java form. See below for further discussion about custom pages.
-
page.<i>.title - Title of the wizard page, displayed in the page’s title area. Defaults to the template name.
-
page.<i>.description - Description of the wizard page, shown in the dialog’s title area below the title. Defaults to text in the format "Page 1 of 3".
-
page.<i>.condition -
A condition for showing the page. If it evaluates to false, the
page will be skipped when it would normally come in the page
sequence of the wizard. This makes it possible not only to skip
pages, but also to show different pages based on some choice
or choices the user made earlier in the wizard (decision tree).
The condition will be evaluated by the template engine, so any
valid FreeMarker expression that can produce true or "true" as
a result will do. The expression must be supplied without the
${and}marks. The string you enter will be substituted into the "${( <condition> )?string}" string (will replace "<condition>"), and evaluate as such. An example will be provided later.
All property file entries are available as template variables, too. In addition, most
property values may refer to other property values or template variables, using
the ${name} syntax.
An XSWT form is defined in an XML file with the root element <xswt>.
Some XSWT specific elements and attributes (import and package
declarations, id and class attributes to name a few) are
defined in the http://sweet_swt.sf.net/xswt XML namespace
(we use the x namespace prefix here).
Controls that can be used in XSWT are instantiated by an element with same name as the control (but starting with lowercase).
Controls and classes used in an XSWT file must be imported before they can be used.
<xswt xmlns:x="http://sweet_swt.sf.net/xswt">
  <x:import>
    <package name="java.lang"/>
    <package name="org.eclipse.swt.widgets" />
    <package name="org.eclipse.swt.custom" />
    <package name="org.eclipse.swt.graphics" />
    <package name="org.eclipse.swt.layout" />
    <package name="org.omnetpp.common.wizard.support" />
    <package name="org.omnetpp.ned.editor.wizards.support" />
    <package name="org.omnetpp.cdt.wizard.support" />
  </x:import>
  <label text="Hello"/>
</xswt>
Entities and attributes in an XSWT file are directly mapped to the corresponding
SWT controls and their properties. For example, a <styledText> tag creates
an org.eclipse.swt.custom.StyledText control. Similarly, a text attribute
causes the setText() method of the control to be called.
<styledText text="Hello world!" />
Alternatively, it is possible to call a public method on the control
by embedding a "call" as a child tag and supplying the parameters as p0, p1, etc.:
<styledText>
  <setText x:p0="Hello World"/>
</styledText>
Note
Because of a limitation in XSWT, only methods accepting String parameters can be
accessed this way.
Integer constants in controls (public static final int fields) can be used in an
XSWT file by appending the Java class name before them:
<gateChooser gateFilter="GateChooser.INOUT|GateChooser.VECTOR"/>
Constants in the SWT class do not need the SWT. prefix. You can write:
<button x:style="RADIO"/>
Children can be added to a compound control inside the <x:children></x:children> tags.
<group text="Hello">
  <x:children>
    <label text="Label 1" />
    <label text="Label 2" />
  </x:children>
</group>
Layout and layout data can also be added as a new tag inside a control element:
<text x:id="numServers" x:style="BORDER">
  <layoutData x:class="GridData" horizontalAlignment="FILL"
              grabExcessHorizontalSpace="true"/>
</text>
Note
Layout is always needed; otherwise, the control will not appear on the page.
Tip
SWT is documented on the Eclipse website. See: http://www.eclipse.org/swt/docs.php for documentation, examples and tutorials.
XSWT allows one to tag widgets with ID attributes. Widget IDs will become the names of template variables with the values being the content of widgets. For example, text widgets (org.eclipse.swt.widgets.Text) provide a string value (Java type "String"), while checkboxes and radio buttons provide a boolean (Java type "Boolean").
XSWT also allows filling up the widgets with default values
(e.g. <styledText text="some text"/> ), but this feature
should be used with care because the defaults set in XSWT may not make it
to the file templates. This occurs because if the user clicks Finish early,
the rest of the wizard pages (and their widgets) may not be created at all,
so values set in the XSWT will take no effect.
For this reason, defaults should always be set in the property file. To do so,
simply use a key with the ID of the widget; those values will be written
into the wizard page when the page is created. For example, if you have a
text widget with x:id="numNodes" and a checkbox with x:id="generateTraffic", then
the following lines
numNodes = 100
generateTraffic = true
will fill in the text widget with "100" and select the checkbox. Widgets that do not have such lines in the property file will be left alone. The property file takes precedence over values specified in the XSWT file.
Compound data structures (arrays, maps, and any combination of them) can be specified in the JSON syntax (http://json.org). They can be iterated over in the templates and can be used as input/output for custom compound widgets. Examples:
apps = ["ftp", "smtp", "news"]
layers = {"datalink":"ieee80211", "network":"ip", "transport":["tcp","udp"]}
Tip
If you get an error about syntax errors in a JSON entry, the http://jsonlint.com website can help you locate the problem.
Now that we have covered basic XSWT, we can revisit how one can use page conditions. Consider the following practical example of creating a wizard for wireless networks.
On the first page of the wizard you could have a [] Configure routing checkbox
with the ID wantRouting. If this checkbox is selected, you want to display
a second page where the user can select a routing protocol, followed by
configuration pages determined by the chosen routing protocol.
To achieve this, you would add the following lines to template.properties:
# page with the "wantRouting" checkbox
page.1.title = General
# page with the "protocol" combobox
page.2.title = Choose Routing Protocol
page.3.title = AODV Options
page.4.title = DSDV Options
page.2.condition = wantRouting
page.3.condition = wantRouting && protocol=="AODV"
page.4.condition = wantRouting && protocol=="DSDV"
The .condition keys will make the wizard include only the pages where
the condition evaluates to true. Conditions can be arbitrary FreeMarker
expressions that evaluate to true (as boolean) or "true" (as string).
Conditions are re-evaluated after every page, so you can depend on variables
edited on earlier pages.
It is also possible to create controls conditionally.
To overcome the limitation that XSWT page descriptions are completely static,
XSWT files undergo FreeMarker template processing before giving them to the
XSWT engine for instantiation. This template processing occurs right before
the page gets displayed, so data entered on previous pages can also be
used as input for generating XSWT source. This feature can be useful in making
conditional widgets (i.e. using <#if> to make part of the page appear only
when a certain option has been activated on earlier pages), to create a
previously unknown number of widgets (using a <#list>..</#list> loop),
to populate combo boxes, listboxes or other widgets with options, and more.
<!-- Show only if the wizard is run from the New Simulation wizard-->
<#if wizardType=="simulation">
<label text="Description how the wizard works for new simulations."/>
</#if>
If the user navigates in the wizard back and forth several times (using the Next and Back buttons), the contents of wizard pages are always re-created with the current values of template variables just before getting displayed, so they will always be up to date.
It is possible to create new Wizard pages, custom widgets or add new template variables by extending the wizards in Java.
Defining a wizard page in Java requires that you install the Eclipse Plug-in Development Environment (PDE) and that you have some Eclipse development skills.
The template.properties key for denoting a Java-based wizard page is page.<NN>.class,
and the value should be the fully qualified name of the Java class that implements
the wizard page. The requirements for the class are:
- the class must be accessible to the class loader,
-
the class must extend
org.omnetpp.common.wizard.ICustomWizardPage, and -
the class must have a public constructor with the following argument list:
(String name, IContentTemplate creatorTemplate, String condition)
Since XSWT works via Java reflection, your own custom widgets can be used in
forms, similar to normal SWT widgets. No glue or registration code
is needed; simply add their package to the <import> tags at the top of the XSWT
file.
However, some Java code is needed so that the wizard knows how to write
template variables into your widgets and how to extract them after editing.
This functionality can be added via the org.omnetpp.common.wizard.IWidgetAdapter
interface. This interface must be implemented either by the widget class
itself, or by a class named <widgetclass>Adapter in the same package.
The interface has methods to tell whether the adapter supports a given widget,
to read the value out of the widget, and to write a value into the widget.
In addition to basic data types (Boolean, Integer, Double, String, etc.),
it is possible to use compound data types as well (i.e. those composed of
the List and Map interfaces of the Java Collections API). The default values
can be given in the template.properties file in the JSON notation and the
result can be used in the templates (iteration via <#list>, etc.).
Jar files placed into the plugins/ subdirectory of an OMNeT++ project will be
loaded automatically and will be available to all templates. Jar files in
that directory may be plain Java jars and Eclipse plug-in jars (the latter
makes it also possible to contribute new functionality into the IDE via
various extension points, but this is outside the scope of this discussion
about wizards).
Jar files placed in the folder of the template will
be loaded automatically when the template is used and the classes in it will
be available for that template. Custom SWT widget classes can be imported and
used in XSWT forms, and other code can be used in the template files via the
FreeMarker Bean Wrapper (e.g. ${classes["org.example.SomeClass"].someStaticMethod(...)},
see the example wizards.) Like .xswt files and template.properties, jar files
are not copied over into the destination folder when the wizard executes.
If you are skilled in writing Eclipse plug-ins, there are ways you can extend
content templates. One is to contribute to the org.omnetpp.common.wizard.templatecontributor
extension point, which lets you supply IContentTemplateContributor objects
that can extend the content template implementation in various ways. You can
contribute new variables, functions or macros to the template context.
- Variables need to be defined. Referring to an undefined variable is an error in FreeMarker (i.e. it does not return an empty string as in bash or in makefiles).
-
Default values should be specified in
template.properties, not in the XSWT forms. You should not define them in the XSWT page by pre-filling the corresponding widget (e.g.<text x:id="n" text="100">). If you specify the value in a page, the assignment will not take effect if the user skips that page (i.e. clicks Finish earlier). That causes the variable to remain undefined, resulting in a runtime error during template processing. -
Type mismatch. Variables have types in FreeMarker and one can get type conversion
errors if the templates are not programmed carefully. For example, comparing a number
and a string is a runtime error. A more serious problem is that widgets in wizard pages may implicitly
perform type conversion. For example, a
numHosts=100line intemplate.propertiesdefines a number, but if you have a<text x:id="numHosts"/>widget in the form, the variable will come back from it as a string. Even worse, whether the number->string conversion takes place will depend on whether the page gets displayed in the wizard session. Therefore, it is recommended that you explicitly convert numeric variables to numbers at the top of templates (e.g.<#assign numHosts = numHosts?number>). -
For some reason, FreeMarker refuses to print boolean variables (e.g.
${isFoo}results in a runtime error). The common workaround is to write<#if isFoo>true<#else>false</#if>; this can be shortened with our iif() function:${iff(isFoo, "true", "false")}. -
Many string operations are available both as built-in FreeMarker operators
(
varname?trim) and as Java methods via FreeMarker’s BeanWrapper (varname.trim()). If you are mixing the two, it is possible that you will start getting spurious errors for the Java method calls. In that case, simply change Java method calls to FreeMarker built-ins. -
Some Java functionality (the instance of operator,
Class.newInstance(), etc.) cannot be accessed via BeanWrapper. If you hit such a limitation, check ourLangUtilsclass that provides FreeMarker-callable static methods to plug these holes.
How can I make a checkbox or radio button? <checkbox> and <radio> are not recognized in my XSWT files!
They are called <button x:style="CHECK"> and <button x:style="RADIO"> in SWT.
My text fields, combo boxes, etc. look strange. What am I doing wrong?
You usually want to add the BORDER option, like this: <text x:style="BORDER">
How can I make a long label wrap nicely?
Specifying x:style="WRAP" is necessary, but not enough. You must also make sure that the label widget expands and fills the space horizontally:
<label text="Some long text...." x:style="WRAP">
    <layoutData x:class="GridData" horizontalAlignment="FILL"
       grabExcessHorizontalSpace="true"/>
</label>
How can I set the initial focus?
Add <setFocus/> to the XML body of the desired widget.
How can I make the presence of some widget conditional to some previous input?
You can use <#if> and other FreeMarker directives in XSWT files. These
files undergo template processing each time the corresponding page
appears.
How can I carry forward data from a previous page to the next?
Use FreeMarker variables (${varName}) in the page.
How can I fill a combo box with values that I will only know at runtime?
You can generate the <option> children of the combo using FreeMarker
directives (e.g. <#list>...</#list>).
How can I have more sophisticated user input than what I can get through simple textedit fields, checkboxes and the like?
You can implement custom SWT controls in Java and use them in the
wizard pages. The custom controls may even be packaged into jar files
in the template’s directory (i.e. you do not need to write a separate
Eclipse plug-in, etc.). Have a look at the source files of the
existing custom controls (FileChooser, NedTypeChooser, InfoLink, etc.).
How can I dynamically enable/disable controls on a page, depending on other controls (i.e. the state of a checkbox or a radio button)?
Currently, you cannot do this. If you are desperate, you have the following options:
(1) put the dependent controls on a separate page, which you can make
conditional; (2) write a custom CheckboxComposite control in Java
that features a checkbox that enables/disables child controls
when the checkbox selection changes; (3) write the full custom wizard
page entirely in Java and register it in template.properties with
page.xx.class= instead of page.xx.file=; or (4) implement scripting support
for XSWT 1.x and contribute the patch to us.
In the Project wizard, how does it get decided which templates get offered when the With C++ Support checkbox is selected and when it is not selected on the first page?
If the C++ support checkbox is cleared, templates that require
C++ support will not appear; when it is checked, there is no
such filtering. A template is regarded as one that requires C++ support
if the template.properties file contains any of the following:
sourceFolders=, makemakeOptions=, or requiresCPlusPlus=true.
Tip
The SWT controls are documented on the Eclipse web site. See: http://help.eclipse.org/galileo/topic/org.eclipse.platform.doc.isv/reference/api/org/eclipse/swt/widgets/package-summary.html
It is possible to bind template variables to a specific control by using the x:id
attribute.
<text x:id="templateVariableName" />
This is the way that template variables are bound to the controls (R=read, W=write):
- Button
This SWT class represents buttons, checkboxes and radio buttons, depending on its style attribute (
SWT.PUSH, SWT.CHECK, SWT.RADIO).- W: the string "true" selects the checkbox/radio button; everything else clears it.
- R: returns a Boolean.
- Combo, CCombo
Represent a combo box and a custom combo box. It can be made read-only (with the
SWT.READ_ONLYstyle). A read-only combo allows list selection but no manual editing. The list items can be specified from XSWT. Variables only work with the textedit part (cannot add/remove list items).- W: the string value gets written into the combo. If the combo is read-only and contains no such item, nothing happens.
- R: returns the currently selected item as string.
- DateTime
A widget for editing date/time.
- W: accepts a string in the following format: "yyyy-mm-dd hh:mm:ss". If the string is not in the right format, an error occurs.
- R: returns a string in the same format, "yyyy-mm-dd hh:mm:ss".
- Label
Label widget (not interactive).
- W: sets the label to the string.
- R: returns the label.
- List
A listbox widget that allows selection of one or more items, depending on the style attribute (
SWT.SINGLEorSWT.MULTI). List items can be specified from XSWT. Template variables only work with the selection (cannot add/remove list items).- W: accepts a string with comma-separated items and selects the corresponding item(s) in the listbox. Items that are not among the listbox items are ignored.
- R: Returns a string array object (String[]) that can be iterated over in the template.
- Scale
A graphical widget for selecting a numeric value.
- W: accepts strings with an integer value. Non-numeric strings will cause an error (a message dialog will be displayed).
- R: returns an Integer which can be used in arithmetic expressions in the template.
- Slider
- A scrollbar-like widget for selecting a positive numeric value. Handled in a similar way as Scale.
- Spinner
- Similar to a textedit, but contains little up and down arrows and can be used to input an integer number. Handled in a similar way as Scale.
- StyledText
- A textedit widget which allows displaying and editing of styled text. Handled similarly to Text.
- Text
A textedit widget. It can be single-line or multi-line, depending on the style attribute (
SWT.SINGLE, SWT.MULTI).- W: accepts a (potentially multiline) string.
- R: returns the edited text as a string.
- HttpLink
A control containing a text and a hyperlink between
<a></a>tags. An URL can be specified to be opened in an external browser.- W: accepts a string with the target URL.
- R: returns the target URL as string.
Other attributes:
-
text : the textual content of the control
<a></a>denotes the link inside. - URL: the target URL where the control points to.
-
text : the textual content of the control
- InfoLink
A control that displays a text with embedded link(s). Clicking on a link will display a hover text in a window. The hover text can be given with the setHoverText method (i.e. the hoverText XSWT attribute), or bound to a template variable (using the x:id XSWT attribute).
- W: accepts a string with the hover text for the control.
- R: returns the hover text as string.
Other attributes:
- text: the content of the control.
- hoverText: the html formatted text displayed in the hover control.
- hoverMinimumWidth: the minimum width for the hover control.
- hoverMinimumHeight: the minimum height for the hover control.
- hoverPreferredWidth: the preferred width for the hover control.
- hoverPreferredHeight: the preferred height for the hover control.
- FileLink
A control for displaying the name of a resource as a link. When clicked, it shows the resource (opens Project Explorer and focuses it to the resource).
- W: accepts a string with the workspace path of the resource to be shown.
- R: returns the full workspace path of the resource.
Other attributes:
- resourcePath: the full workspace path of the file.
- FileChooser
A control for selecting a file from the workspace. Implemented as a Composite with a single-line Text and a Browse button.
- W: accepts a string with the workspace file name.
- R: returns the name of the selected file as a string from the workspace.
Other attributes:
- fileName : the full workspace path of the selected file.
- ExternalFileChooser
A control for selecting a file from the filesystem. Implemented as a Composite with a single-line Text and a Browse button.
- W: accepts a string with the full file name.
- R: returns the name of the selected file as a string from the filesystem.
Other attributes:
- fileName : the full filesystem path of the selected file.
- SaveAsChooser
A control for selecting a name for a new file from the workspace. Implemented as a Composite with a single-line Text and a Browse button.
- W: accepts a string with the workspace file name.
- R: returns the name of the selected file as a string from the workspace.
Other attributes:
- fileName : the full workspace path for the new file.
- ExternalSaveAsChooser
A control for selecting a name for a new file in the filesystem. Implemented as a Composite with a single-line Text and a Browse button.
- W: accepts a string with the full file name.
- R: returns the name (with full filesystem path) of the new file as a string.
Other attributes:
- fileName : the full filesystem path for the new file.
- GateChooser
A control for selecting a gate of a NED module type. If the module exists, it lets the user select one of its gates from a combo; if the module does not exist, it lets the user enter a gate name.
- W: accepts strings with a gate name.
- R: returns the name of the selected gate as a string.
Other attributes:
- gateName: the name of the selected gate.
- nedTypeName : the NED type whose gates should be enumerated.
gateFilter : type filter for the enumerated gates. Expects a binary OR (|) of the following values:
GateChooser.INPUT, GateChooser.OUTPUT, GateChooser.INOUT, GateChooser.VECTOR, GateChooser.SCALAR.<gateChooser x:id="gateName" nedTypeName="${nodeType}" gateFilter="GateChooser.INOUT|GateChooser.VECTOR"/>
- NedTypeChooser
A control for selecting a NED module type. An existing type name can be selected or a new one can be entered.
- W: accepts strings with a NED type name.
- R: returns the name of the selected NED type as a string.
Other attributes:
- nedName: the NED module type as a string.
acceptedTypes : filter for the enumeration of types. Expects a binary OR (|) of the following values:
NedTypeChooser.MODULE, NedTypeChooser.SIMPLE_MODULE, NedTypeChooser.COMPOUND_MODULE, NedTypeChooser.MODULEINTERFACE, NedTypeChooser.CHANNEL, NedTypeChooser.CHANNELINTERFACE, NedTypeChooser.NETWORK.<nedTypeChooser x:id="channelType" acceptedTypes="NedTypeChooser.CHANNEL"/>
Note
Table and tree widgets are currently not supported in a useful way; the main reason being that SWT Tables and Trees are not editable by default.
Some non-interactive widgets which cannot be connected to template variables but are useful in forms as structuring elements:
- Composite
Used to group two or more controls into a single one.
<composite> <layoutData x:class="GridData" horizontalSpan="2"/> <layout x:class="GridLayout"/> <x:children> <button x:id="dynamic" text="Dynamic" x:style="RADIO"/> <button x:id="static" text="Static" x:style="RADIO"/> </x:children> </composite>- Group
Used to group the controls with a visual heading.
<group text="Heading text"> <x:children> <label text="Control 1"/> <label text="Control 2"/> </x:children> </group>- TabFolder/TabItem
Can be used to group the controls into separate pages.
<tabFolder>
  <x:children>
    <composite x:id="page1"></composite>
    <composite x:id="page2"></composite>
    <tabItem text="Tab 1" control="page1"/>
    <tabItem text="Tab 2" control="page2"/>
  </x:children>
</tabFolder>
variable name | project | simul. | msgfile | inifile | nedfile | wizard | export |
| X | ||||||
| X | X | X | X | X | X | X |
| X | X | X | X | X | X | X |
| X | X | X | X | X | X | X |
| X | X | X | X | X | X | X |
| X | ||||||
| X | X | X | ||||
| X | X | X | X | |||
| X | ||||||
| X | ||||||
| X | ||||||
| X | X | X | X | X | X | |
| X | X | X | X | X | X | |
| X | X | X | X | X | X | |
| X | X | X | X | X | X | |
| X | ||||||
| X | ||||||
| X | ||||||
| X | ||||||
| X | X | X | ||||
| X | X | X | X | X | X | |
| X | X | X | X | X | ||
| X | X | X | X | X | ||
| X | X | X | X | X | X | X |
| X | X | X | X | X | X | X |
| X | X | X | X | X | X | X |
| X | X | X | X | X | X | X |
| X | X | X | X | X | X | X |
| X | X | X | X | X | X | X |
| X | X | X | X | X | X | X |
| X | ||||||
| X | X | X | X | X | X | X |
| X | X | X | X | X | X | X |
In the following sections, we describe the individual wizard types and their supported template variables. Variables will be marked with one or more letters to show in which wizard types they are supported as shown in the previous table.
- A: supported in all wizards
- P: project
- S: simulation
- M: messagefile
- I: inifile
- N: nedfile, simplemodule, compoundmodule, network
- W: wizard
Variables marked as (*) are set by the wizard automatically and generally it does not make sense to change their values.
-
date(A) - current date in yyyy-mm-dd format
-
year(A) - year in yyyy format
-
author(A) - user name ("user.name" Java system property)
-
licenseCode(A) - license identifier for the @license NED property
-
licenseText(A) - copyright notice for the given license
-
bannerComment(A) - banner comment for source files; includes license text
-
wizardType(A,*) -
the wizard type the template is invoked as. One of the
following:
project,simulation,nedfile,inifile,msgfile,simplemodule,compoundmodule,network,wizard, orexport -
templateName(A,*) - name of the template
-
templateDescription(A,*) - template description
-
templateCategory(A,*) - template category, used to visually group the templates in the wizards
-
templateURL(A,*) - the URL, the template was loaded from (only for built-in and other URL-based wizards)
The following variables are only defined if the template was loaded from the workspace
(i.e. a project’s templates/ subdirectory):
-
templateFolderName(A,*) - name of the folder (without path) in which the template files are located
-
templateFolderPath(A,*) - full workspace path of the folder in which the template files are located
-
templateProject(A,*) - name of the project that defines the template
-
targetFolder(A,*) - the project or folder path in which the project will generate files. For project wizards, this holds the name of the project being created; for file wizards, it holds the name of the folder in which the file will be created; and for simulation wizards, it holds the name of the folder where files will be created.
-
targetFileName(N,I,M,*) - the name of the new file to be created. The file can be specified on the first wizard page.
-
targetTypeName(P,S,N,I,M) -
a typename that can be used as the main type for the resulting code
(for projects, it is the
${projectName}; for simulations, it is the specified${simulationName}; and for the rest of wizards, it is calculated from the${targetFileName}). -
targetMainFile(P,S,N,I,M) -
a file name that can be used as the main output file for the template
(for projects and simulations it is
${targetTypeName}.ned, while for ned, msg and ini files, it is${targetFileName}).
-
rawProjectName(A) - the project name, "as is"
-
projectName(A) - sanitized project name with the first letter capitalized
-
projectname(A) - sanitized project name; all in lowercase
-
PROJECTNAME(A) - sanitized project name; all in uppercase
Sanitization means making the name suitable as a NED or C/C++ identifier (spaces, punctuation and other inappropriate characters are replaced with underscore, etc.).
-
addProjectReference(P) - If true, the wizard will make the result project dependent on the project containing the wizard itself.
-
withCplusplusSupport(P,*) - Whether the project supports C++ code compilation. This is the state of the "C++ support" checkbox on the first page of the project wizard. Setting this variable does not have any effect on the created project.
-
sourceFolders(P) - Source folders to be created and configured automatically
-
makemakeOptions(P) - makemake options, as "folder1:options1, folder2:options2,…". The wizard will automatically configure the C++ project with the given options.
-
requiresCPlusPlus(P) -
If true, the wizard requires the "support C++ option" during the project creation.
If any of the
sourceFoldersandmakemakeOptionsare present orwithCplusplusSupport=true, the template will be displayed only if the "support C++ option" option was set on the first page of the project wizard. -
namespaceName(S,N,M) -
The namespace where C++ classes should be placed.
This is determined automatically by looking up the value of the
@namespaceproperty in NED files in the NED source folder.
-
nedSourceFolders(P) - NED source folders to be created and configured automatically.
-
nedPackageName(P,S,N,I) -
The NED package name. For projects, it is
${projectname}. For simulations, NED and INI files, it is automatically calculated from the folder hierarchy where the file is generated.
-
simulationFolderName(S,*) - the folder where the simulation will be created
-
simulationName(S,*) -
The name of the simulation. It is the capitalized and
sanitized name derived from the
simulationFolderName.
-
newWizardName(W,*) -
The name of the new wizard to be created. It is the name
of the folder under the
templatesdirectory where all the template files will be stored. -
newWizardProject(W) - The project where the new wizard will be created.
The variables below are for advanced use only. They can be used to access directly all known NED and message types, static classes for utility functions and the whole context used during template processing.
-
creationContext(A) - The template evaluation context. Provided for low level access.
-
classes(A) - Access to class static models. It is possible to access class static methods via this variable. See http://freemarker.org/docs/pgui_misc_beanwrapper.html#autoid_54 for further details.
-
nedResources(A) - Provides direct access to the in-memory model of the parsed NED files. It is possible to query, check and iterate over the available NED types.
-
msgResources(A) - Provides access to the in-memory model of the parsed NED files.
Note
In addition to the above variables, all keys found in the template.properties file are added automatically to the context as a template variable.
In addition to the standard FreeMarker template constructs, there are several Java utility classes, template macros and functions that can be used in your wizard templates to ease the development of custom wizards. The following sections briefly describe these classes and methods.
iif(condition, valueIfTrue, valueIfFalse)
Inline if. The FreeMarker language does not have a conditional operator
(like ?: of C/C++ ), but the iif() function can save you from
having to spell out <#if>..<#else>..</#if>, when required.
It is important to note that unlike in C/C++, the evaluation is not lazy (i.e. both the "then" and
the "else" expressions are always evaluated).
<@do expression !/>
FreeMarker does not have a construct for calling a function and then discarding
the result. One could use <#assign dummy = expression>, but this will fail if the called (Java) function is void or returns null.
We recommend our small <@do ..!/> macro which takes one argument and does nothing,
and the exclamation mark (the FreeMarker default value operator) cures the
void/null problem.
The following Java classes are available during template processing:
- Math
- java.lang.Math
- StringUtils
- org.apache.commons.lang.StringUtils
- CollectionUtils
- org.apache.commons.lang.CollectionUtils
- WordUtils
- org.apache.commons.lang.CollectionUtils
- FileUtils
- see below for documentation
- NedUtils
- see below for documentation
- IDEUtils
- see below for documentation
- ProcessUtils
- see below for documentation
- LangUtils
- see below for documentation
Represents the Java Math class, which contains mathematical functions. See http://java.sun.com/j2se/1.5.0/docs/api/java/lang/Math.html .
Math has the following methods:
double cos(double x)
double sin(double x)
double pow(double x, double y)
etc.
Represents the Apache Commons StringUtils class, which contains over a hundred utility functions for manipulating strings. See: http://commons.apache.org/lang/api/org/apache/commons/lang/StringUtils.html .
StringUtils has the following methods:
boolean isEmpty(String s)
boolean isBlank(String s)
String capitalize(String s)
String upperCase(String s)
String lowerCase(String s)
boolean startsWith(String s, String suffix)
boolean endsWith(String s, String prefix)
String[] split(String s)
String join(String[] strings)
etc.
Represents the Apache Commons WordUtils class, which contains utility functions for manipulating strings as word sequences. See http://commons.apache.org/lang/api/org/apache/commons/lang/WordUtils.html .
WordUtils has the following methods:
String wrap(String str, int wrapLength)
String capitalize(String str)
String swapCase(String str)
etc.
Represents the Apache Commons CollectionUtils class, which contains some useful functions for manipulating collections (like lists). Functions include computing set union, intersection, and difference. See http://commons.apache.org/collections/apidocs/org/apache/commons/collections/CollectionUtils.html
CollectionUtils has the following methods:
Collection union(Collection a, Collection b)
Collection intersection(Collection a, Collection b)
Collection subtract(Collection a, Collection b)
etc.
Contains utility functions for reading files in the following formats: XML, JSON, CSV, property file, and functions to read and return a text file as a single string, as an array of lines, and as a an array of string arrays (where string arrays were created by splitting each by whitespace).
There are two sets of functions; one works on files in the Eclipse workspace and the other on "external" files (i.e. files in the file system). Files are interpreted in the Java platform’s default encoding (unless they are XML files, which specify their own encoding).
FileUtils has the following methods:
org.w3c.dom.Document readXMLFile(String fileName)
org.w3c.dom.Document readExternalXMLFile(String fileName)
Parses an XML file, and return the Document object of the resulting DOM tree.
Object readJSONFile(String fileName)
Object readExternalJSONFile(String fileName)
Parses a JSON file. The result is a Boolean, Integer, Double, String, List, Map, or any data structure composed of them. The JSON syntax is documented at http://json.org ; if you want to check whether a particular text file corresponds to the JSON syntax, use http://jsonlint.com .
String[][] readCSVFile(String fileName, boolean ignoreFirstLine,
                       boolean ignoreBlankLines,
                       boolean ignoreCommentLines)
String[][] readExternalCSVFile(String fileName, boolean ignoreFirstLine,
                       boolean ignoreBlankLines,
                       boolean ignoreCommentLines)
Reads a CSV file. The result is an array of lines, where each line is a string array. Additional method parameters control whether to discard the first line of the file (which is usually a header line), whether to ignore blank lines, and whether to ignore comment lines (those starting with the # character). Comment lines are not part of the commonly accepted CSV format, but they are supported here nevertheless due to their usefulness.
Properties readPropertyFile(String fileName)
Properties readExternalPropertyFile(String fileName)
Parses a Java property file (key=value lines) in the workspace. The result is a Properties object, which is a hash of key-value pairs.
String[][] readSpaceSeparatedTextFile(String fileName,
                         boolean ignoreBlankLines,
                         boolean ignoreCommentLines)
String[][] readExternalSpaceSeparatedTextFile(String fileName,
                         boolean ignoreBlankLines,
                         boolean ignoreCommentLines)
Reads a text file and return its contents, split by lines with each line split by whitespace. Additional method parameters control whether to ignore blank lines and/or comment lines (those starting with the # character). The result is an array of lines, where each line is a string array of the items on the line.
String[] readLineOrientedTextFile(String fileName)
String[] readExternalLineOrientedTextFile(String fileName)
Reads a text file in the workspace and returns its lines. Comment lines (those starting with a hash mark, #) are discarded. The result is a string array.
String readTextFile(String fileName)
String readExternalTextFile(String fileName)
Reads a text file, and return its contents unchanged as a single string.
boolean isValidWorkspacePath(String path)
Returns true if the given string is syntactically a valid workspace path.
boolean isValidWorkspaceFilePath(String path)
Returns true if the given string is syntactically a valid workspace file path. This function does not check whether the file exists, or whether the given path already points to a resource of a different type.
IWorkspaceRoot getWorkspaceRoot()
Returns the workspace root object. The workspace contains the user’s projects.
IProject asProject(String path)
Returns the handle for the workspace project with the given name. Throws exception if the path is not a valid workspace project path. This function does not test whether the project exists. To test that, call the exists() method on the returned handle.
IContainer asContainer(String path)
Returns the handle for the workspace container (i.e. project or folder) with the given name. Throws exception if the path is not a valid workspace container path. This function does not test whether the container exists. To test that, call the exists() method on the returned handle.
IFile asFile(String path)
Returns the handle for the workspace file with the given name. Throws exception if the path is not a valid workspace file path. This function does not test whether the file exists. To test that, call the exists() method on the returned handle.
IResource asResource(String pathName)
Returns the handle for the workspace project, folder or file with the given name. If the resource does not exist and the path contains more than one segment (i.e. it cannot be a project), it is returned as a file handle if it has a file extension, and as a folder if it does not.
File asExternalFile(String path)
Returns a java.io.File object for the given path. The object can be used to access operations provided by the File API, such as exists(), length(), etc.
void copy(String path, String destPath, IProgressMonitor monitor)
Copies a workspace resource (file, folder or project) specified with its path to the destination path. For projects and folders, it copies recursively (i.e. copies the whole folder tree). From the project root directory, it leaves out dot files, hidden files, and team private files.
void copyURL(String url, String destFilePath,
                      IProgressMonitor monitor)
Copies the file at the given URL to the given destination workspace file.
String createTempFile(String content)
Writes the given string to a temporary file and returns the path of the temporary file in the file system. The file will be automatically deleted when the IDE exits, but it can be also deleted earlier via deleteExternalFile().
void createFile(String fileName, String content)
Creates a workspaces text file with the given contents in the platform’s default encoding.
void createExternalFile(String fileName, String content)
Creates a text file in the file system with the given contents in the platform’s default encoding.
void deleteFile(String fileName)
Deletes the given workspace file. It is acceptable to invoke it on a nonexistent file.
void deleteExternalFile(String fileName)
Deletes the given file from the file system. It is acceptable to invoke it on a nonexistent file.
void createDirectory(String fileName)
Creates a workspace folder. The parent must exist.
void createExternalDirectory(String fileName)
Creates a directory in the file system. The parent must exist.
void removeDirectory(String fileName)
Deletes a workspace folder. The folder must be empty. It is acceptable to invoke it on a nonexistent folder.
void removeExternalDirectory(String fileName)
Deletes a directory in the file system. The directory must be empty. It is acceptable to invoke it on a nonexistent directory.
Provides utility methods to work with NED types and check their existence.
NedUtils has the following methods:
boolean isVisibleType(String typeName, String inFolder)
Returns whether the given NED type is visible in the given folder. If the type is a fully qualified name, it is recognized if it is defined in the same project as the given folder, or in one of its referenced projects. If the type is a simple name (without package), it is recognized if it is in the NED package of the given folder.
INEDTypeInfo getNedType(String typeName, String inFolder)
Like isVisibleNedType(), but actually returns the given NED type if it was found; otherwise, it returns null. Useful if you implement a complex wizard page in Java.
Provides entry points into various aspects of the IDE. This includes access to the Eclipse workspace (projects, folders, files) and the NED index. The former is documented in the Eclipse Platform help; documentation for the latter can be found in the sources (Javadoc). See http://help.eclipse.org/galileo/index.jsp?topic=/org.eclipse.platform.doc.isv/guide/resInt.htm and http://help.eclipse.org/galileo/topic/org.eclipse.platform.doc.isv/reference/api/org/eclipse/core/resources/IWorkspaceRoot.html
IDEUtils has the following methods:
boolean openConfirm(String title, String message,
                            String detailsMessage)
boolean openQuestion(String title, String message,
                             String detailsMessage)
boolean openError(String title, String message,
                          String detailsMessage)
boolean openWarning(String title, String message,
                            String detailsMessage)
boolean openInformation(String title, String message,
                            String detailsMessage)
Opens a standard message dialog with a closable details message.
Provides a collection of Java language related utility functions.
LangUtils has the following methods:
boolean hasMethod(Object object, String methodName)
Returns true if the object has a method with the given name. Method args and return type are not taken into account. Search is performed on the object’s class and all super classes.
boolean hasField(Object object, String fieldName)
Returns true if the object has a field with the given name. Field type is not taken into account. Search is performed on the object’s class and all super classes.
boolean instanceOf(Object object, String classOrInterfaceName)
Returns true if the given object is an instance of (subclasses from or implements) the given class or interface. To simplify usage, the class or interface name is accepted both with and without the package name.
String toString(Object object)
Produces a user-friendly representation of the object. In case of collections (lists, maps, etc.), the representation is JSON-like.
List<Object> newList()
Creates and returns a new mutable List object (currently ArrayList).
Map<Object, Object> newMap()
Creates and returns a new mutable Map object (currently HashMap).
Set<Object> newSet()
Creates and returns a new mutable Set object (currently HashSet).
Class<?> getClass(Object object)
Returns the class of the given object. Provided because BeanWrapper seems to have a problem with the getClass() method.
Provides functionality to start external applications from the wizard.
ProcessUtis has the following methods:
ProcessResult exec(String command, String[] arguments,
                           String workingDirectory,
                           String standardInput, double timeout)
Executes the given command with the arguments as a separate process. The standard input is fed into the spawn process and the output is read until the process finishes or a timeout occurs. The timeout value 0 means wait infinitely long to finish the process. Arguments at the end of the argument list are optional.
String lookupExecutable(String name)
Finds the given executable in the path and returns it with full path. If not found, it returns the original string.