Tkenv Usability Improvements |
The Tkenv GUI has been redesigned for single-window mode to improve usability and user experience. New inspector windows can still be opened, and they are kept always above the main window. |
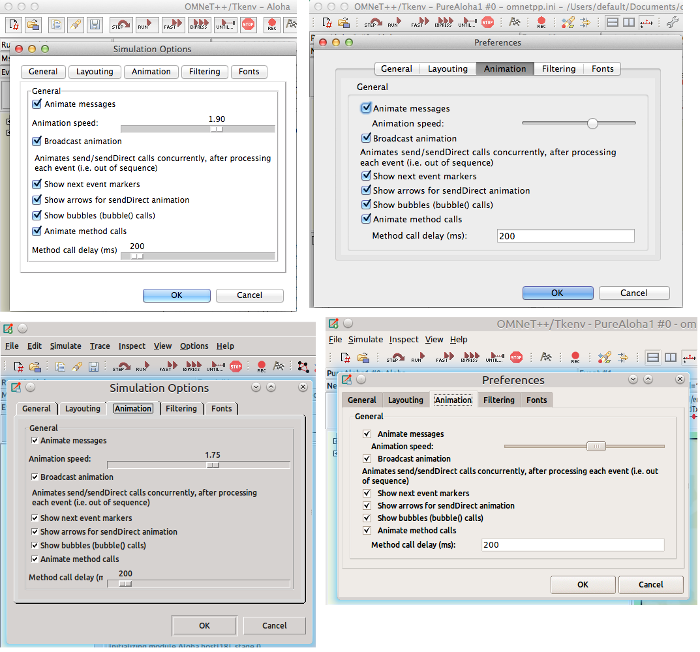
New Look and Feel |
Tkenv has also received a new, modern look and feel, due to the use of the Ttk widgets and a custom Ttk theme. This makes a huge difference in looks on all platforms, but especially on OS X. See before (left) and after (right) screenshots. |
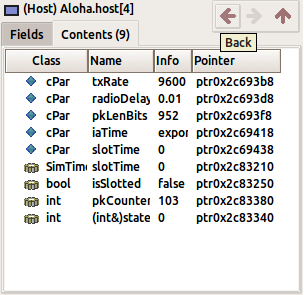
Inspector Navigation History |
Inspectors are no longer tied to a single object and visited objects are remembered as navigable history (back/forward/up). Local toolbars were added to the upper right corner of the inspectors with navigation and other context aware actions. |
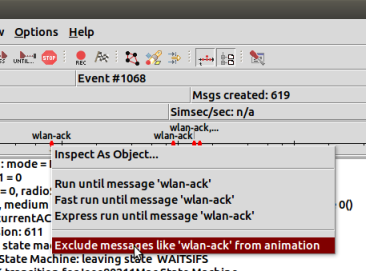
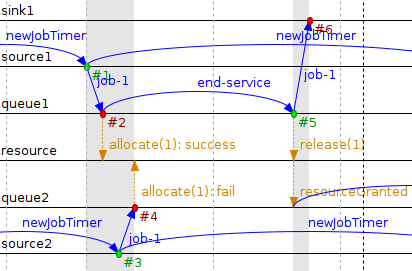
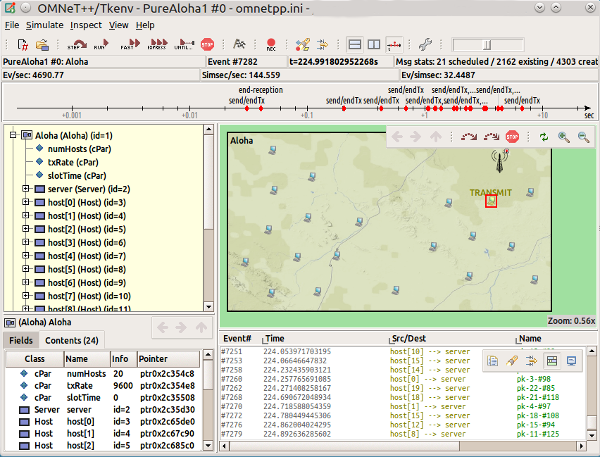
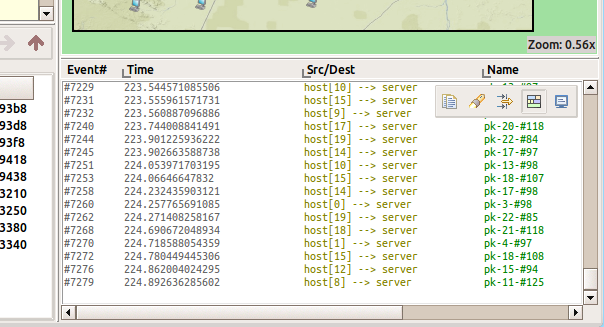
New Message Tracing |
Tkenv now stores message sendings and also a clone of corresponding message objects (cMessage), and can show them in the log window. Message printer classes can be contributed to customize the content of the log lines. Switching between the module log and the message trace is possible using the local toolbar in the log inspector window. |
Optimized Status Area |
The status area is more concise now (two rows instead of three), and shows more information at the same time. A part of the status area can be turned off to free up vertical space (Ctrl+D). |
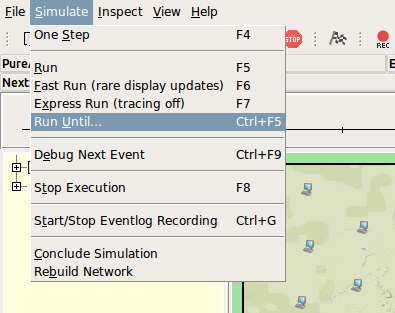
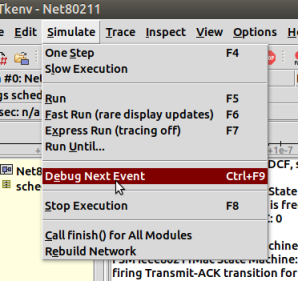
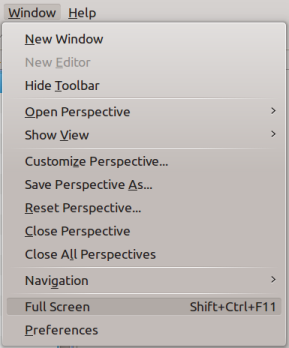
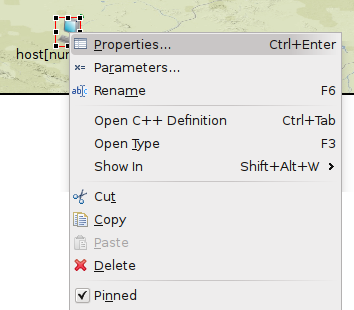
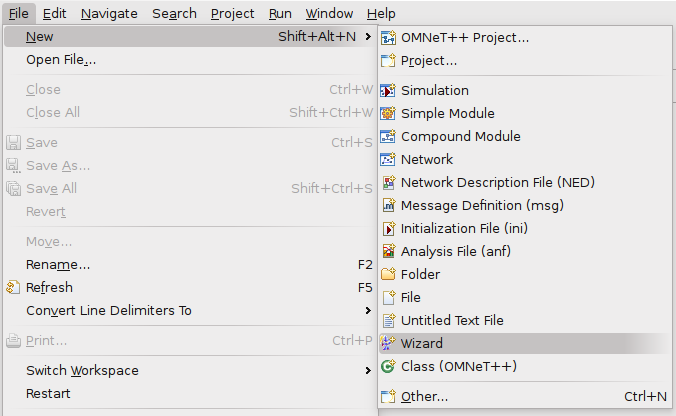
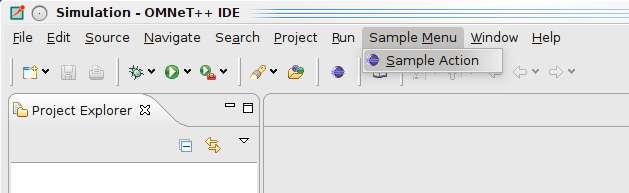
Main Menu Cleanup |
We have reorganized the main menu, removed obsolete menu items and added numerous smaller improvements: additional hotkeys (Ctrl+Plus/Minus for Zoom, Ctrl+F5 Run Until, Ctrl+Q Quit); on-demand scrollbars (i.e. they are hidden when not needed); module graphics now remembers zoom level and settings per NED type; etc. |
Animation Filtering |
This feature makes it possible to suppress animation of messages that you are not interested in (e.g. WLAN ACK frames, ARP exchanges, etc). Just right-click the message (either on the canvas or on the timeline), and choose "Exclude messages like '...' from animation" from the context menu. The filters can also be edited in the Simulation Options dialog. |
Debug Next Event (Ctrl+F9) |
This function causes the simulation program to stop in the debugger just before entering the handleMessage() call. You just need to hit "Step Into" in your debugger to debug that event. |
Based on Eclipse 4 |
The IDE is now based on Eclipse 4.3.1 (Kepler) and CDT 8.2.1. |
Project-Specific Icons |
Images from the "images/" folder of the project and its dependencies are automatically used by the NED editor, and added to the Tkenv image path when the simulation is launched. (The per-project image path will be configurable in future versions.) |
Attach external debugger on error |
The simulation kernel can invoke an external debugger on an error. The Ini file editor allows you to specify the options related to the just-in-time debugging feature. |
"First Steps" Dialog |
When the IDE is started with an empty workspace (e.g. on first-time launch), it offers the user the following options: (1) Import the OMNeT++ sample simulations into the workspace; and (2) Download and install the INET Framework. |
"Install Simulation Models" Dialog |
INET installation is also available from the menu. It brings up a dialog with the list of simulation models available for automated installation, and lets the user choose. Currently only the INET Framework is listed there, but it is planned to add further models |
Intro Pages |
When the IDE is started for the first time, it now displays some helpful introductory pages in the editor area: "Getting Started", "At a Glance" , "OMNeT++ Samples", etc. These pages are also available from the Help system (except the last one, which has a dedicated menu item in the Help menu.) |
More Usable Filter Hints |
In the Analysis Tool, if you filter for the module, hints for the statistic name filter will only show statistics recorded by that module. (In general, filter hints for a combo are now computed from the result items filtered by the other combos.) |
More Accessible "Go to" Actions |
In the Output Vector View (Analysis Tool), "Go to" actions are now shown in the context menu instead of the view's pulldown menu. |
Launching Improvement |
Trying to launch a closed project will now offer opening it. |
Computed Scalars |
Analysis tool: Added support for computed scalars. Read the updated the User Guide for further details. |
Logarithmic X Axis |
Analysis tool: Added the 'Logarithmic X axis' option to scatter charts. |
Full-Screen Mode |
Added full-screen mode (Ctrl-Shift-F11). |
Updated Eclipse Platform |
The IDE is now based on Eclipse 3.8.2. |
Updated Eclipse Platform | The IDE is now based on Eclipse 3.7.1 and CDT 8.0.1. (Click on the links to review the changes in Eclipse and CDT.) |
Eclipse Marketplace | You can use the Eclipse Marketplace to install additional features into the IDE by selecting Help | Eclipse Marketplace... |
Error Markers on Connections | Connections with an error are now annotated with a marker in the graphical editor. |
Package Names in Graphical Editor | The graphical editor now displays the package name at the top of the canvas. |
Visible Self-connections | Connections that start and end at the same module are now represented by arcs in the top-right corner of the module. Previously, self-connections were represented only by a small arrow head. |
Rearranged Context Menu | The context menu in the graphical editor has been rearranged to increase its usability. |
Changing the Visual Appearance of the Modules | A new Properties dialog has been introduced that lets you change the name, type, vector size and visual appearance of modules and channels. The dialog is accessible from the context menu or by pressing Ctrl-Enter after selecting an item or several items together. |
Changing Module Type and Vector Index | The 'General' tab in the properties dialog allows you to change the name, vector size and type of a module. |
Enhanced Type Selection Dialog | The Open NED Type dialog now shows you the project name where the opened type is defined. This is especially useful if you are working with multiple open projects. |
Excluding NED Packages | The IDE now allows you to exclude specific NED packages from the NED path. NED files in those packages will not generate errors and they cannot be edited in the NED editor. This feature is useful for disabling certain parts of your project. |
Clean Local Project Only | The new 'Clean Local' action on the project context menu allows you to clean only the selected project without invoking the 'Clean' action on referenced projects. This is useful if your project references a third party project (e.g. the INET Framework) and you want to clean only your own project, but not the third party one. |
Partition your Project into Features | The IDE now allows you to partition your projects into smaller parts called 'Features'. Features can depend on each other and can be enabled/disabled independently. The IDE handles the C++ source and NED package exlusion/inclusion automatically, based on your feature selection. Features can also define macros which will be passed to the compiler, so it is possible to write conditional code that depends on the enablement of certain features. This is especially useful for large projects like the INET Framework. See the User Guide for further details. |
Rearranged INI Editor Pages | The pages in the form based INI editor have been rearranged for better usability. |
Getting the Command Line | The IDE launcher now prints out the command line to the console before starting your simulation. You can use this information to start your simulation from the command prompt. |
Profiling with Valgrind | On Linux systems, the IDE now allows you to start and profile your program using 'valgrind'. This allows you to detect memory errors and other programming mistakes. This feature is available only on Linux systems where valgrind is installed. |
Enhanced Navigation | The context menu now contains additional actions to move to a certain simulation event or simulation time. |
New Eclipse Platform | The IDE is now based on Eclipse 3.5.2 and CDT 6.0.2. |
Manual Palette Filtering | Palette items in NED editor can be filtered with a substring search. |
Adaptive Palette Ordering | Submodule types that are related to the currently used compound module and its submodules are displayed first in the NED editor palette. Submodules that are already used in the compound module are placed at the top. The @labels properties on the gates are also used to decide which other submodules can be connected to the current ones. |
Connection Chooser Enhancements | When two modules are connected with a connection, the editor tries to guess which gates must be connected, based on @labels gate properties. |
Connection Rendering Enhancements | Multiple and conditional connections can now be visually distinguished in the graphical editor. |
New Parameter Editor Dialog | A parameter editor dialog has been added for channel and module parameters. It can be accessed using the context menu of the submodule or connection. |
Content Assist for Connections | Content assist is now supported for connection parameters (delay, datarate etc.). |
Content Assist for Icons | Content assist is available for icons by pressing Ctrl+Space inside a display string. |
Content Assist for Colors | Content assist is available for colors by pressing Ctrl+Space inside a display string. |
Content Assist for Statistics | Content assist is available for statistics by pressing Ctrl+Space inside a @statistic property definition. |
Support for @dynamic Property | Modules can be tagged with the @dynamic property. Dynamic modules are handled exactly the same way as normal modules (i.e. content assist, validation and parameter lookup is working correctly), except that the simulation kernel does not instantiate them automatically during network setup. Dynamic modules are displayed as semi-transparent in the NED editor. |
Enhanced Content Assist in Ini Files | Content assist is now available for ini parameters and configuration options. For parameter values, content assist also offers the list of NED functions. |
Channel Parameters in Ini Files | Channel parameters can be set in ini files, too, using the **.channel.parametername = syntax. |
Statistics Configuration from Ini File | Statistics can be configured in an ini file. Content assist is available for statistics-related options. |
Statistics and Signals in Module Hierarchy | In addition to parameters, the Module Hierarchy view now also displays the @statistic and @signal properties of the modules. |
Better Error Checking | The simulation launcher now checks for errors in open projects before starting a simulation, and warns if there are any. |
Attach Vectors to Sequence Charts | Attaching vectors to a Sequence Chart is more intuitive now. |
Show Related Vectors Only | After choosing a vector file, the IDE only offers the vectors related to the selected module axis. |
Method Calls on Sequence Charts | Direct method calls can be shown in the sequence chart. Method calls are not displayed automatically, but can be turned on on the toolbar or in the sequence chart context menu. |
New Tree View in Browse Data | An "All" tab has been added to the Browse Data page, showing all simulation results in a tree. The tree can be configured freely to group the data several in different ways. Use the context menu to configure the levels in the tree view. |
Redesigned Filter | The filter interface on the Browse Data page has been reorganized to provide more space. Fields are also resizable by dragging the separators. |
Properties for Dataset Nodes | Property View for nodes on the Dataset page. |
Properties for Data Items | Property View for the data items on the Browse Data page |
Chart Sheet Columns | The number of chart columns can be set for a Chart Sheet. |
Separate Horizontal and Vertical Zoom | Separate horizontal and vertical zoom actions are available on the toolbar and in the context menu. The context menu has been reorganized for better usability. |
Charts on Sheet Fill the Window | Charts in a Chart Sheet fill the window horizontally. The minimum chart width is also configurable. |
Chart SVG Export 1 | Charts can be exported in SVG format from the Dataset page's context menu. |
Chart SVG Export 2 | Charts can be exported in SVG format from the chart context menu. |
Editable Chart Line Titles | Line titles on charts are editable now. |
Add Your Own Wizards to the IDE | New wizards can be contributed by open projects. (In the screenshot, the "New Queueing Model" wizard was contributed by the "queueinglib" sample project.) |
Custom Wizard Pages | Wizards contributed by projects may contain their own custom wizard pages. |
Topology Generation using Wizards | The IDE also contributes several generic topology generator wizards. |
Custom Page for each Topology Generator | Each topology generator has its own wizard page for configuration. |
Topology Import | Importing a topology from an external file is also possible. |
Wizard Wizards | There are several wizards that help creating other wizards. It is possible to create a wizards based on an already existing simulation directory, or based on an other wizard. Example wizards are also provided to help you quickly create your first wizard... |
New Wizard from an Existing One | New wizards can be created by either copying and modifying an existing similar one or by generating some example code. |
New Wizards by Specifying their Widgets | New wizards can be created by including some specific widgets as a starting point... |
New Wizards by Specifying their Variables | New wizards can be created by textually specifying their input variables and the associated widget types. |
Wizard Cloning | Existing wizards can be cloned and used as a starting point. |
Wizard Page Editor | The wizard page (XSWT) editor and preview are available by double-clicking on XSWT files. |
Wizard Template Editor | Template editor with syntax highlight and content assist support is available to help you author new wizard content templates. |
Automatic Plugin Activation | The IDE now automatically discovers and activates all Eclipse plug-ins in a project's "plugins" folder. This feature allows you to distribute IDE extensions together with your project, and they will be automatically loaded and activated when your users open the project. |